Friday, July 30, 2010

Powder Room

So after the big living room project, we'll be closing in on the finish line.

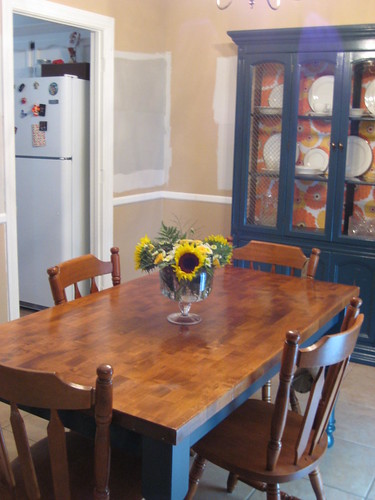
All of the projects we have left are things that we will either have to hire a pro for (new carpet) or we just have to pick out (new dining room table). We do have to replace the tile in the kitchen and bathrooms, but that's a job that will probably wait until we replace the carpet, so we can be sure that the floors throughout the house can coordinate.

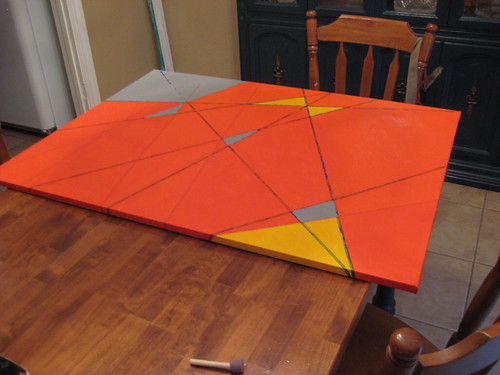
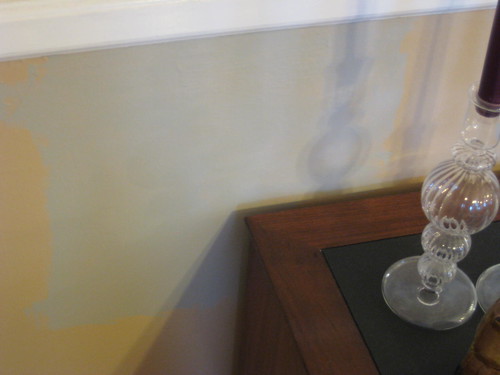
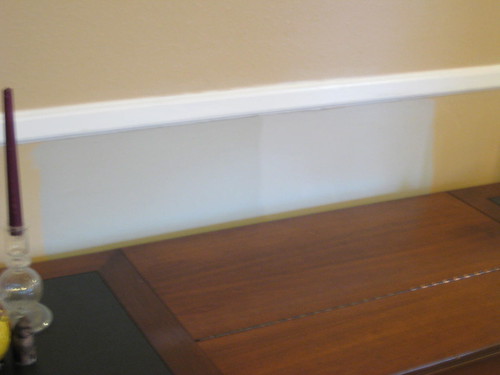
But once the living room/dining room/staircase is painted and put back together (and the trim. ugh), painting/reno will be almost complete.

In fact, the only room we'll have left after we finish the largest space in the house, is the smallest space in the house. And one of my favorites, the powder room.

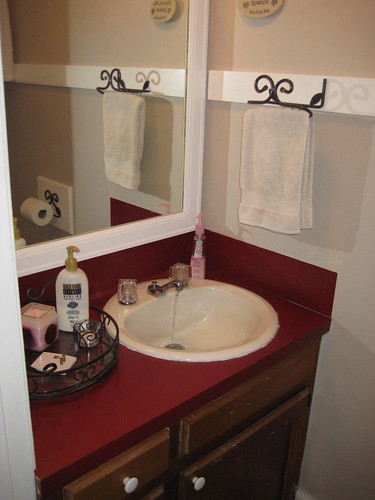
This room is tiny, I could guess about 15 square feet. It contains a small vanity, a toilet and some shelving on the walls. And maroon formica. But for some reason, I love it. I just love the feeling of being in a small space.

Now, it is nearly impossible to capture such a small space on film, but here it was before we bought the place. It looks much the same now, except the sink is usually filled with drying paintbrushes (this is our "dirty sink"). And the front piece of the formica is ripped off, thanks to my clumsiness.

ds-1030 013

The previous owners of our house seemed to have a penchant for putting wall anchors everywhere except where they were actually needed. So, we have random ones all over the wall, where they were apparently required to hold photo frames.

But behind curtains rods? Nope, just a giant painted over nail holding it up.

And every towel bar, toilet paper holder, or hook, even the tiny ones meant to hold our car keys by the back door, is not held up by an anchor, oh no. Instead, they just nailed a piece of wood to the wall and secured them to that.

We dealt with it in our master bath by painting these odd rails a contrasting color. I like that look a lot, but I don't want to repeat it in the powder room.

quickie light 013

And since we scored an old sewing table that we want to convert to a vanity for just $20, we'll probably do some damage to those walls anyway when we rip out the old one. I've been trying to decide whether resurfacing the walls was worth it, but luckily I came across these amazing photos from Design Sponge.


Beadboard it is! Didn't Andrea and Nathan do an absolutely incredible job in there? I love all of the black and white details.


We'll bring our beadboard up a little higher (probably 60 ish inches) to play up how tall the ceilings are. And since it's such a small room, we'll choose a wallpaper that's more white than black. Right now, I have my heart set on the Blackbird wallpaper from Walnut Wallpaper (in the white and black colorway, although this Kraft one is gorgeous too).


But I'd also be perfectly happy with this one from Marimekko.


Then, we'll put up crisp, white crown molding and paint the ceilings gray. We'll bring in a white vessel sink and a hopefully black faucet, and lots of brass accents. I truly can't wait to make this little gem shine!

Rods

This is one of those things I always struggle with. Picking out fabrics is easy. Bedding? No problem. Even furniture and artwork comes a little easier to me.

I can never pick out curtain rods.

I'm planning to whip up some yellow chevron curtains for our guest room tomorrow and Sunday. I know I want to use rings, so the rod needs to be round, but that is about all I know.

I love the squared, chrome rod we bought for the office.


But for the rest of the house, I've just reused an old one. So far, they're fine. I generally want the curtains to be the star of the show, and the rod to just be background.

Still, I'm struggling to find something for the guest room. It's definitely one of the more traditional rooms, even if I've punched it up in the color/accessories department. And it's 100%, the girliest room in the house. The color scheme of soft blue-green with accents of yellow, orange, and in your face PINK is all girl.

My first thought was that white was the way to go. But every white curtain rod I can find it just so frou-frou. I don't need crystals, I don't need swirls, I don't need a cage on the end. I pretty much just want plain and white. So why is it that the only place I can find this is at an upscale teen furniture store, where it will cost me like $50?

I'm assuming I'll have better luck when I actually hit a store.

But the bright side is, I found the rods I NEED for the living room. They're totally the wrong feel for the guest room. But I need them. With the dark gray metal and the acrylic finials. Yes.


But you know what's killing me? I know exactly which curtain rod I want, but I don't think they make it anymore. This one used to be available on a few websites, and I had it bookmarked on Amazon where I think I remembered it being around $25. But now that I need it, I can't find it. It's a sweet touch of whimsy that ties in our house's animal theme.


And nothing else seems right. Don't you just hate it when you know exactly what you want and you can't find (or make) it?

Finished!

I could resist pulling the tape this morning before work!

photo

I'm in love! Can't wait to see it up on the wall.

Thursday, July 29, 2010

2 for 2

The second manicure I've done since we bought our house?

painting 010

Ruined. This one lasted little longer, at 4 days. Maybe I can pretend I was going for a splatter paint look. At least the colors match, I guess!

But the project you can see in the background was totally worth it.

I know by now you've seen the gorgeous color field painting that's been floating around the blog world. Originally done by The New Domestic, they created a beautiful piece with just a little effort. It's been copied plenty of times over, and I was happy to try my hand at it.

I bought the largest canvas they had at Hobby Lobby, as well as yellow, orange, and white acrylic paint (I already had some black). I also got some 1/4" Art Tape in crepe. Which honestly is pretty much really skinny masking tape.

painting 003

I used almost 2 rolls on a 30x40 canvas, but it will depend on how many lines you want.

painting 001

I used the pattern of The New Domestic painting as a guide, but changed it up a little bit. I just taped lines, making sure to keep the tape as straight as possible, and wrapped it all the way around the back. Then I used my finger to smooth and press down the tape, to try to prevent any seeping.

My canvas had a smudge and a dark spot on it (discount! I saved $5) so I was careful to avoid these areas, since once I removed the tape, I would be looking at bare canvas.

painting 002

It looks kind of cool already!

Then, I mixed my gray paint (black, white, and a teeny tiny bit of yellow) and started painting. Gray first, continuing the paint around the canvas edge. Yellow was up next. The yellow paint wasn't quite as opaque as the other colors, so I had to make sure each yellow piece was VERY clean. Then I moved onto the orange.

painting 004

I love this color so much, and it dried beautifully!

It took me a couple of hours to finish the piece, with a dinner break in the middle. I purposely wanted it to look very much like a painting, so I did one coat and left in some brush strokes. If you want a more saturated look, you may need two coats.

painting 012

I can't wait to pull the tape and hang it up tomorrow!

Tuesday, July 27, 2010

Pets and hair

Pets are an obviously wonderful addition to a home. I love having pets and our little trio of kitties makes me immensely happy.

But pets come with some sacrifices when your house is involved. I'd prefer it if we didn't have tons of neon jingle balls rolling around. I'd prefer it if I didn't have to look at a scratch pad all the time, but these are things I'm happy to live with to have more moments like this.

P1010029

But we have made some adjustments over time. We have a designated cat toy basket, and only a few of their most loved toys (jingle balls and the ever present milk cap ring) are out all the time. We rotate a fresh stash to keep them busy. We also let them play with their favorite thing, cardboard boxes, for an hour or two and then out they go.

We also moved the litter boxes out to the sunroom. It really helps our sanity when the cat door acts as an extra barrier. It's stopped cat litter from getting all ove the house.

But there's one thing we've never really been able to eliminate The dreaded pet hair tumbleweed.

I know we're not the only ones dealing with this menace. Little balls of fluffy hair drifting across the hard surface floors make my husband growl with rage. You can pick them up all day, but they never stop forming. And it seems sweeping only makes them worse.

Our first line of defense was a Roomba. It held the hair at bay but never eliminated them entirely. But as the battery slowly died, we ended up depending more and more on our $5 garage sale Dirt Devil. We knew it wasn't cutting it, but we kept on in denial.

Then on Saturday, it died. We did a little research and decided on the Bissell Pet Hair Eraser, for $149 at Target.


Oh. My. God.

This thing is incredible. Incredible! I balked at the price (no way will I ever be a Dyson owner) but wanted to try it out. This thing is amazing. It glides like a dream, and it picked up so much hair and nastiness that we had to empty it twice in our bedroom alone.

Yeah, disgusting I know. But our floors are CLEAN now. Our carpet looks so amazing that I'm putting off my daydreams of new carpet. It made such a huge difference, that I can't recommend this product enough for pet owners. After about a minute of using it, Brett yelled "I'm going to vacuum every day!" Unfortunately, he hasn't made good on that promise, but a girl can dream.

It has several attachments with rubber brushes for picking up hair (along with anything else lurking in there). The attachments were great on the stairs, and we can't wait to try them out on the furniture. It was a little confusing to put together (the instructions were not so great), but after about 15 minutes we were ready to roll.

All in all, this vacuum has pretty much done the impossible: made vacuuming enjoyable for two very lazy housekeepers.

Saturday, July 24, 2010

Squee!!

Guess what's sitting in the dining room floor as we speak?

paint 002

Looking at that big old pile makes me realize just what a big job this is going to be!

That's 7 gallons of paint for the walls (4 are in the box). I chose Duration Home in Matte. It's low VOC and super cleanable, which is a must for the staircase and hallway.

We got three gallons of ceiling paint, in the cheapie Design Basics. We decided on Repose Gray for the ceiling, to add some depth. We think our nine foot ceilings can handle it.

And I also picked up a quart of Black of Night and some tinted primer for the fireplace! I can't wait to try it out and see how it looks.

Friday, July 23, 2010

Birthday Wishes!

I feel like I'm a pretty lucky lady, so I didn't have a lot to wish for this birthday. I already got an iPhone, and I was really only expecting my annual dollar bill from my grandparents (always one of my most anticipated pieces of mail!), and maybe a pair of Tom's from my parents.

But I got much, much more than I bargained for!

I woke up to a couple of cards Brett had squirreled away after getting them in the mail the day before. I got my dollar bill all right, but I also had a surprise from my in-laws. They sent me a beautiful card along with a gift card to Lowe's!

I'm already planning on how to use it. I took a scouting trip this morning (actually, I was ready to make my purchase and realized I left the card in Brett's truck while I was moving it to get out of our driveway. Oopsie!

First on the list is a kit to cover up our cords in the living room. They have a kit with several lengths of paintable cord cover moldings with some connectors that should work just fine.

And I scoured the lighting section for a new dining room chandelier, but nothing lit my fire. Same story in the outdoor rug department. But there's a fixture I've had my eye on for months, to replace the one we installed over our sink. I bought that fixture not because I loved it, but because it coordinated with the two ceiling fans we love downstairs. I just really want something that fits in better with the feel of the kitchen. Simple, bright, cool, this is it.


Then, I came home to some beautiful white and yellow flowers on the counter. I think it's no coincidence that I've been extolling my love of yellow lately. Awww, he pays attention!

flowers 011

Don't you just love the texture of sunflowers?

flowers 012

So pretty!

And while at work, I got a call from my mom and grandma. Guys, my 70 year old Nana is my biggest blog devotee. So when she walked into a fabric store and saw this:


She immediately remembered that I had posted it before. When I was extolling my love for chevron, I linked to that fabric from Premier Prints. What I didn't realize was that one of their few retail locations was in none other than my birthplace, Meridian, MS! They happened to stop in after my aunt ordered some upholstered pieces, and she recognized the chevron and called me.

And thanks to Nana, my fabric stash has grown exponentially overnight.

Y'all, the customer service at this place was fantastic. I sat on the phone with my mom giving her style names and colorways. They helped her find every fabric, suggested some other products I might like, and offered to overnight some things they didn't have in stock for no charge. They were also really great about helping my mom, who's not a seamstress, figure out how much fabric I would need for projects. There were a couple fabrics with large repeats, and I was unsure about how much extra yardage I would need to work with that.

They also do upholstery and sell furniture pieces that are covered in their fabrics.

Of course, I got some of that yellow Chevron. I'm planning to use it for some drapes in the guest room!

And I also got a larger chevron to recover the $3 chair. I can't wait to see it done! This is actually the third fabric I've bought for the chair, but it's definitely the last. No, I mean it (the others will find homes as living room curtains, a table runner and placemats, and an ironing board cover.


I also got smaller pieces of a lot of fabrics to build up my stash. Orange houndstooth, anyone?


And I couldn't resist this owl pattern.


I can't wait to lay my head on a pillow with this beautiful fabric.


I don't know what I'm using this for yet, but I can't wait to see it.


This beauty will make some Euro Shams for our bedroom.


Just finding the store was gift enough, but my mom called to let me know she wasn't going to let me pay her back for all of these goodies. Way too generous, right? It blew my mind!

And a little bird told me there's a gift card to Sherwin Williams on the way. And since Sherwin Williams is running 30% off for preferred customers this weekend, it seems like even my favorite paint store is getting in on the birthday action. And I've decided the black fireplace is a YES. Or at least a YES, we'll try it and paint over it if we hate it.

I also got taken out on a date by the hubs. We saw Inception (I loved it, he hated it) and stuffed ourselves with fondue, then came home and watched Top Chef. Pretty much the perfect night, am I right? All in all, my twenty fifth was much better than I expected. And thanks to some gift card action and a new fabric stash, my home to do list has just gotten much bigger!

Tuesday, July 20, 2010

Black walls?

I know, it's a crazy thought for someone who hated the darkness of her house just a year ago.

But I'm really thinking I need a black accent wall in my living room.

We considered painting the back staircase wall a different color (it's currently a lighter, and clashing, shade of tan than the rest of the room).

living room 4

But we decided we wanted continuity on the way upstairs, so it will be the same color as the rest of the room.

We also considered wallpapering the back wall of the dining room in a bold pattern. But with our blue china cabinet and patterned backing, it would just be too much.

tile 043

And that really only leaves one spot that makes any sense.

living room 3

The fireplace.

Since this picture was taken, we've tiled with white and dark gray subway tile between the mantel and the fireplace insert itself.

tile 027

With that black TV and the black fireplace insert and the dark gray tile, I'm toying with the idea of painting the chimney wall flat black. Before you call me crazy, check out this black wall eye candy.


I can just see my brass candlesticks and some yet to be determined white accents shining from a black backdrop.

Now, I just have to convince my husband and myself that it's worth the $15 it'll cost to try it out.

Sunday, July 18, 2010

Are you tired of it yet?

My talking about the living room color, I mean.

When I shared the conversation with my husband where he told me I would change my mind fifty more times about paint, I didn't realize just how right he would be.

No, we're not approaching thirteen paint samples like we did in the kitchen. But we're up to 8. Two Valspar colors, two Martha Stewart colors, two standard Sherwin Williams colors, one SW color lightened a little bit, and one color where I told the guy behind the counter that it wasn't quite light enough and a little too blue, maybe not green enough, you know? Thankfully, he did know, and he mixed me a sample that is just labeled "Gray."

We have big gray splotches all around the room, on most expanses of available wall space. The problem with a space this big, that includes a dining room, a big, long, not very well lit living room, a staircase and a very poorly lit hallway, is that we like different colors in different spaces.

In the dining room, near the window and the front door?

colors 024

I really love that top color, which is SW Mindful Gray. In case you're wondering, the bottom color is "Gray" and the other two are SW Agreeable Gray and a lighter version of the same.

I'm also loving Mindful Gray on the other dining room wall, looking into the kitchen (on top, the bottom is "gray"). Please excuse the fuzziness of some of these photos. I took most without a flash to get the truest color.

colors 008

Mindful Gray also looks pretty great with our mirror, and since gray+wood tone is one of my favorite looks, that's a big deal to me.

colors 010

Elsewhere in the dining room, though, "gray" is the front runner. It looks fabulous next to our funky blue china cabinet. It's the small patch in the middle. The others are Agreeable Gray and the lighter version.

colors 004

We have so many samples up, we painted samples on top of samples. In this picture you can see all the colors previously mentioned, plus Valspar Stony Path and a little bit of Valspar Seashell Gray under a newer sample.

colors 003

And here, we found out that SW Mindful Gray and Martha Stewart Bedford Gray are pretty much the same color. The big patch is Bedford Gray, with Mindful gray to the right and "gray" up top.

colors 009

In the living room things get a little more complicated.

At the base of the staircase Agreeable Gray (left) looks perfect, while Stony Path, Seashell Gray, and the lighter AG are all too something.

colors 015

But up the stairs, "gray," to the right of Mindful Gray, has me ready to paint.

colors 018

On the other side of the room, I'm stuck thinking Mindful gray is too dark. (L to R, Bedford Gray, Martha Stewart Nimbus Cloud, Mindful Gray, and "Gray")

colors 016

But in the end, it's the media console that has me convinced.

Bedford Gray

colors 020

Mindful Gray and "gray"

colors 021

And Nimbus Cloud

colors 023

Mindful Gray is the one. It's got just enough green and not so much blue that I'm worried about it not coming up neutral. It looks great with our curtain fabric (in fact, it's almost the exact color of the gray stripe!). And it dark enough to give me a cozy feeling, but not so dark that I feel like I'll need a headlamp to get around. Lucky for me, Duration paint is 20% off until the 31st, so I'll be picking up the 7 gallons very soon!

But just so you know, if anyone in real life asks me, the color is called Heavy Goose.

Summer Style

With my big two-five coming up this week, I gave my husband strict instructions.

No gifts.

We just upgraded my iPhone last month, and I am completely attached to my new 4, so I definitely didn't think I needed anything else to help celebrate a quarter century.

But apparently my brain didn't get that message, because I've been doing a little shopping. Not decor/home related, sorry. But The Gap's online clearance sent me into a frenzy of outfitting myself for a bright, stripey, nautical (second half of) summer.

The first thing I picked up was another pair of skinny jeans, cropped this time.


Skinny jeans from the Gap are my biggest wardrobe staple. Their cut is insanely flattering. If you think you're not skinny enough for skinny jeans, try these out, for real. I'm super excited to add a cropped version.

I can't wait to pair them with this adorable sweater. A silk blend for only $12.99!


And this adorable ruffled tank, with a gray (0f course) cardigan.


I've had my eye on these shorts since they first appeared, and I was happy to snap them up once they were half price.


And I also got a nautical striped tank dress that will be perfect for hot weekends.


Then I continued my shopping spree with this new bag from etsy seller ikabags.


And today I got a red quilted clutch wallet, a gold leaf headband, and the cutest antique gold tone necklace with a pair of scissors as a charm.

I can't help but notice the stripes, the navy, the red, the yellow, and notice that it reminds me a lot of the color schemes I've picked for the sunroom and the living room. Especially when I add these pieces into my already gray wardrobe, I'll look right at home.

porch 007

I'm so excited about my new handbag, I couldn't resist a sewing project. I prefer big handbags, so that I don't have to carry a separate laptop bag. But letting my laptop bang around in a giant cloth bag isn't the best idea. So I whipped up a replacement for my old gray sleeve. Something that will fit the cheerier feel of my new bag!

For this project, you'll need a half yard of two fabrics (one more heavy for the outside, and one for the lining). You can use the same fabric if you'd like. You'll also need a half yard of 1/4 thick lining. I used a double thickness of bamboo batting, and it worked great.

First measure your laptop's dimensions. Measure end to end both ways, and also all the way around, both width wise and length wise.

laptop 002

I came up with 10.5"x13", and a circumference of 24" on the short side, and 29" on the long side. These measurements are for a 15" Think Pad, but you'll want to take your own.

To determine how big to cut your fabric, divide your circumferences by two and add an inch. I came up with 13"x15.5", and cut two pieces of each fabric to this size.

For the bunting, divide the circumference by two, and that's your measurement. For my computer, I needed two pieces 12"x14.5".

laptop 007

I decided to use ribbon and two D-rings as a closure (like a d-ring belt). Some other options are a big button and elastic, a flap with velcro, and a simple tie closure. You'll need to modify these instructions a little bit if you want a flap, but basically you'll need to cut one piece of each fabric a little longer, accounting for the flap.

Once you have your fabric cut, you're ready to pin it. Pin one liner piece and one outer piece together, right sides in, along the short side. If you're doing elastic or ribbon closure, you'll need to pin it into the seam before you sew.

laptop 008

See the ribbon sticking out? There is a much longer length between the fabrics.

Once you've sewed this seam, turn the right sides out and iron the seam. If you're doing the D-ring closure, then you should go ahead and sew the other length of ribbon on the opposite side. This would also be a good time to attach buttons or velcro.

At this point, you'll have your two sides with some sort of closure attached.

laptop 009

Now, you'll put in your batting between the layers of fabric. Line up the short side with your short seam, and then smooth the other layer over the batting.

laptop 011

Then pin each side together, lining out, and sew around the long sides and the bottom short side. Turn it inside out and you should have a laptop shaped pouch!

laptop 012

Test it out to make sure your laptop fits.

laptop 014

Success! Then attached your D-rings and finish the end of the other ribbon at an appropriate length.

laptop 015

Then close it up, and you've got a laptop sleeve that's perfectly coordinated to your bag!

laptop 016