Last week I finally got frustrated enough with the state of my pantry and did something about it. At first I was just disgusted with the avalanche of plastic grocery bags that rained down on me every time I needed something. We use these bags for cat litter and the occasional lunch that won't fit in my lunch box. So they're a necessity, but I really needed a way to keep them under wraps.
Enter grocery bag holder.
But even though this one was a deal at $10, I remembered that my grandmother had one made out of fabric, and I wondered if I could make one with some scrap fabric. I found some directions (google grocery bag holder for tons of options. I chose these from Make It and Love It.)
I used some fabric and bias tape from my scrapbox, and bought half a yard of elastic for just 11 cents. How's that for a budget project?
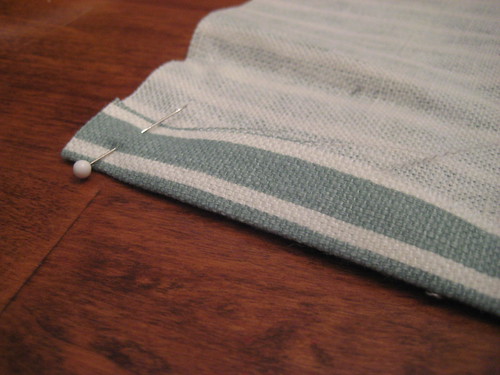
I started with a rectangle of fabric, 20 by 25 inches, and pinned the short sides with a hem wide enough to push my 1/4" elastic through.
Then, I threaded the elastic. This was absolutely the hardest part of the project, and I struggled quite a bit. I eventually figured out that my best bet was to pin the elastic at one end, and poke through the other end with the sharp end of a skewer. Then I poked the skewer into the tube, and scrunched the fabric down until the elastic was exposed. Then I took it off the skewer, pinned it down on the other side, and sewed down both sides.
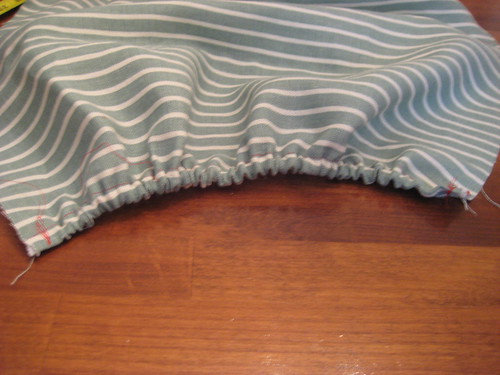
You will need two pieces of elastic. 11 inches for the top, where you can put the bags in, and 6 1/2 inches for the bottom, so you can pull them out one at a time.
Then pin the long sides together, right sides in, and stitch up the remaining side.
Finally, add a loop for hanging. You can use ribbon but I just used leftover bias tape. Turn it inside out and stuff!
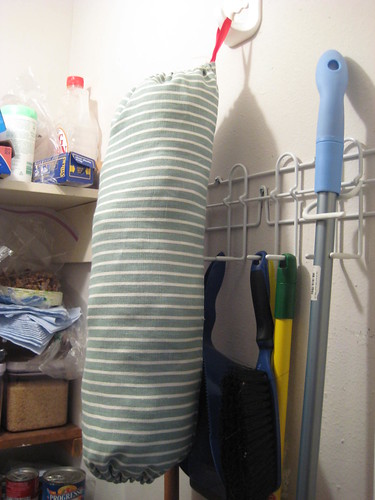
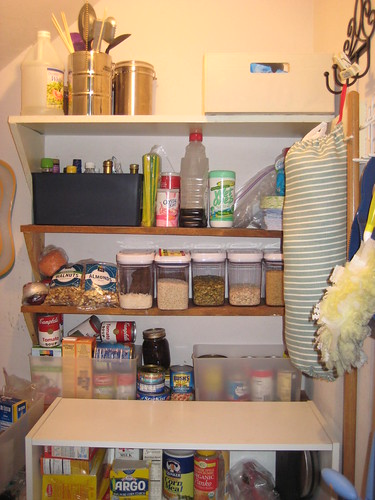
And if the little peek into our pantry shelves doesn't make you break into hives, then check this out.
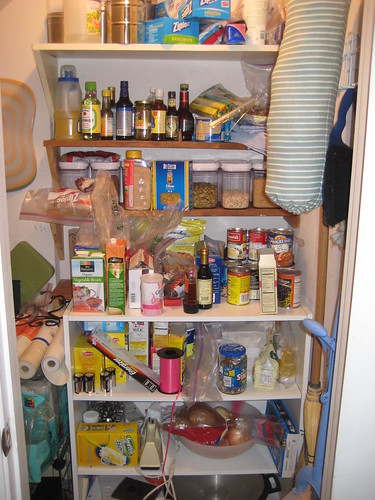
I didn't even take a picture of the rest of the pantry, since I couldn't look at it without crying. But armed with some serious determination, I bought a few bins and tackled everything else. After a few bags of trash and the discovery of several rolls of toilet paper buried under a pile of crap, we now have a clean, beautiful pantry.
We have a bin for snacks/breakfast, one for condiments/vinegars, one for Italian, one for soups/broths, and one for Mexican.
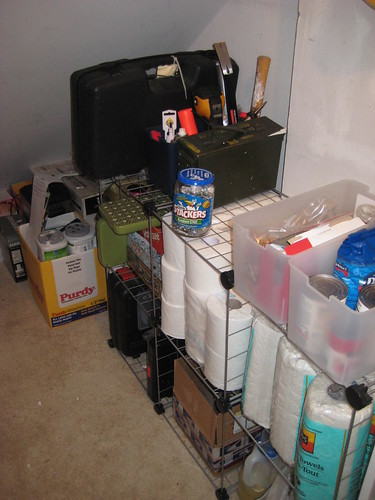
Since I took this picture, I also added a drawer organizer for some of our smaller hardware related stuff.
I'm just so happy to say I can actually walk in here!