Monday, May 31, 2010

Back to Reality

After over a week off work, I'm heading back to work in the morning. I'm not going to lie, the thought of it is giving me a sad. And the though of getting up to go to the gym before work after a week off makes me want to cry.

But I had a great week off and got so much done! The projects I did (and some that I started and nee to finish) have me really excited.

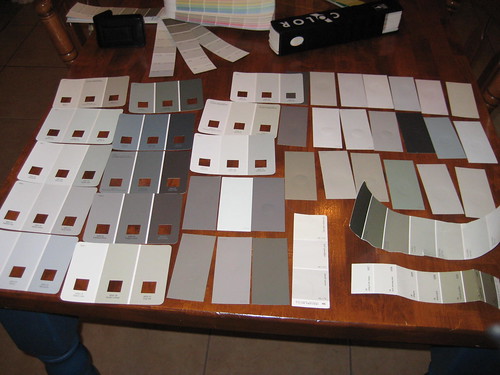
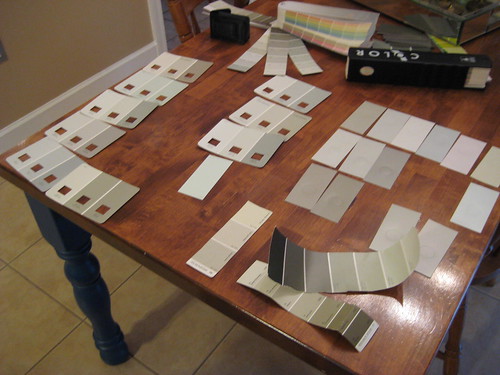
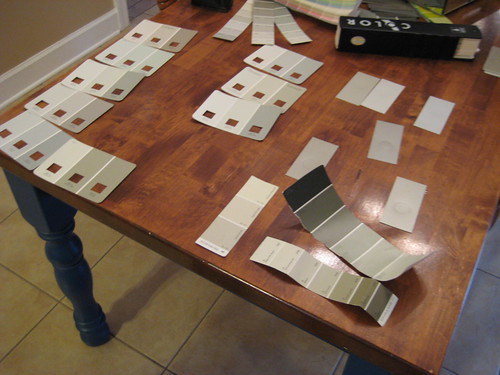
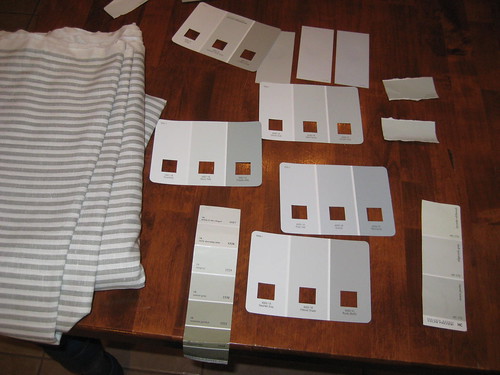
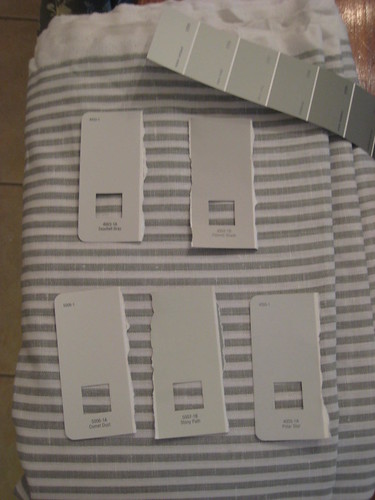
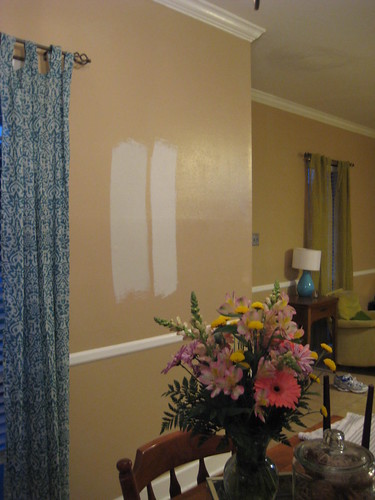
Last weekend, I didn't do much except clean the house and pick a paint color for the living room. Then Tuesday, I headed off for a few days in Houston. I lived here as a kid, and haven't been back since 91. I saw a lot that triggered my memories, spent some time with a friend and her brand new baby, and did a lot of shopping!

First, I checked out HomeGoods for the first time. At first, I was disappointed. It was just a home section in the back of Marshall's. Then when I actually went back there, I realized it was much bigger than I thought. I was seriously impressed with the lighting selection. It really made me wish I needed lamps! The only room I need a lamp for is the guest room, and they didn't have one quite small enough. The prices were amazing, though!

I didn't end up buying anything, though. Partly because I didn't find anything I couldn't live without, and partly because I was holding onto my decor dollars for our next destination.

houston 019

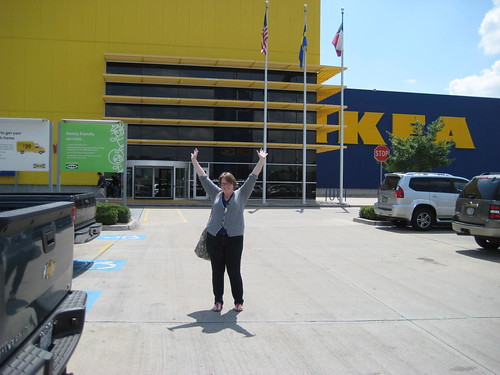
I'm an unashamed Ikea fangirl, people. This place is my home. I'm pretty sure I could literally live in here.

I came with a mission: bookshelves for the office and a long list of fabrics. But just like last time, I got sucked into the displays and was mesmerized. My shopping buddy (my mom, an Ikea virgin) was also enamored. We ended up having lunch in the restaurant and spending all day there.

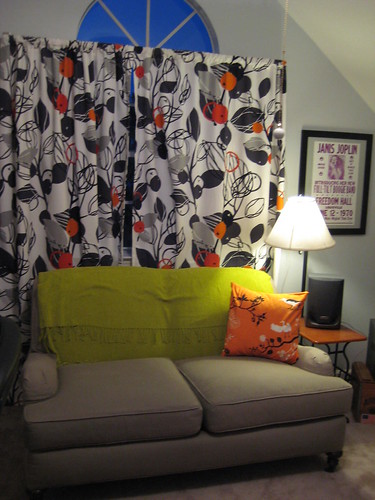
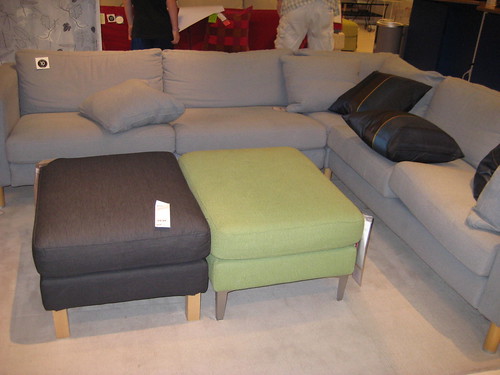
We were both very inspired by one of the first display rooms we saw.

houston 022

I loved the gray couches with the flat woven rug and the white furniture. It really confirmed that the color scheme we;re planning for the living room is the right thing for us.

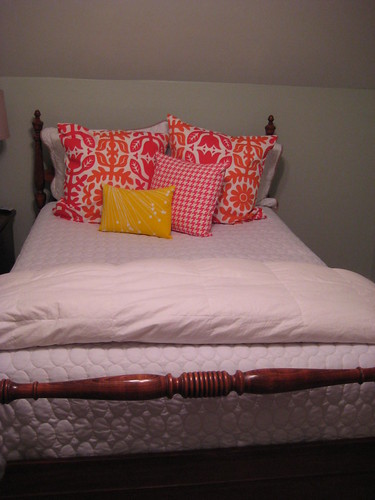
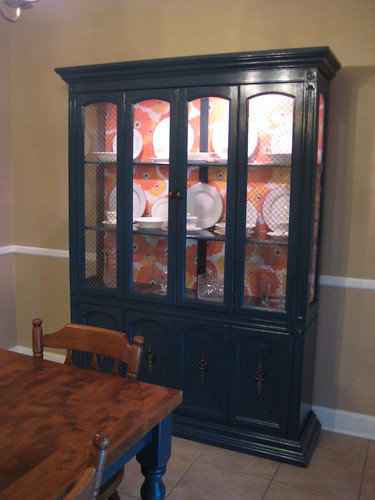
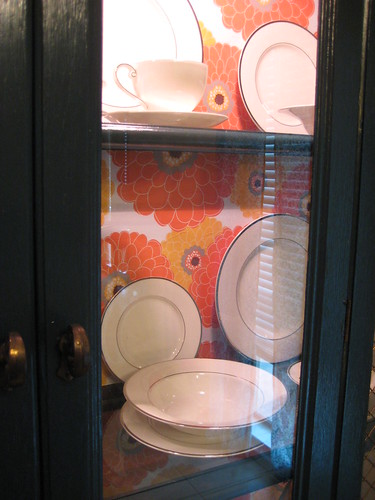
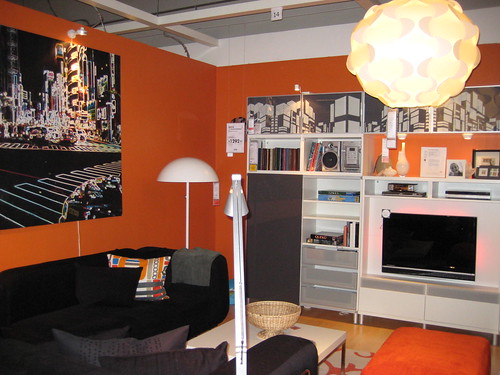
I also loved this room. I wish I was bold enough to paint a room orange! It's my favorite color, but I'm too chicken to go that far. I'll just stick to accents!

houston 025

I also picked out some furniture for a future trip. When we're ready to buy a sofa and dining room furniture, we're planning to make the trek to Houston so we can have access to Ikea, West Elm,and some of the boutique stores.

We haven't decided on a sectional or a sofa and loveseat yet, but we know it will be gray, and we're pretty sure it will be Karlstad. We love the color on this ottoman.

houston 024

And I'm pretty much set on the Torsby table (the larger version, but with this white glass). I also love the Tobias chairs (probably the clear) but I'm not 100%.

houston 029

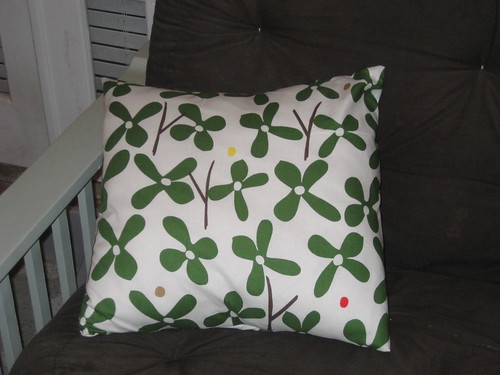
The fabric selection wasn't great, and I wasn't able to get a lot of the fabrics I wanted. But I found a lot of great alternatives, and I can't wait to tackle some sewing projects in the weeks ahead.

I ended up with the bookcases, fabric, a new living room rug, and a storage piece for the kitchen, as well as a few odds and ends. I'll be showing the kitchen piece later, once I've styled it (It's sitting mostly empty in the kitchen for now).

I wasn't planning on buying a rig for a while, but when I saw this one in that first display room, I fell in love. The color scheme was perfect, and at $150, you couldn't beat the price. I passed it up at first, but I couldn't stop thinking about it. When my mom saw me looking at it for the tenth time, she very generously offered to buy it for us, and now it's very happy in its new home!

houston 039

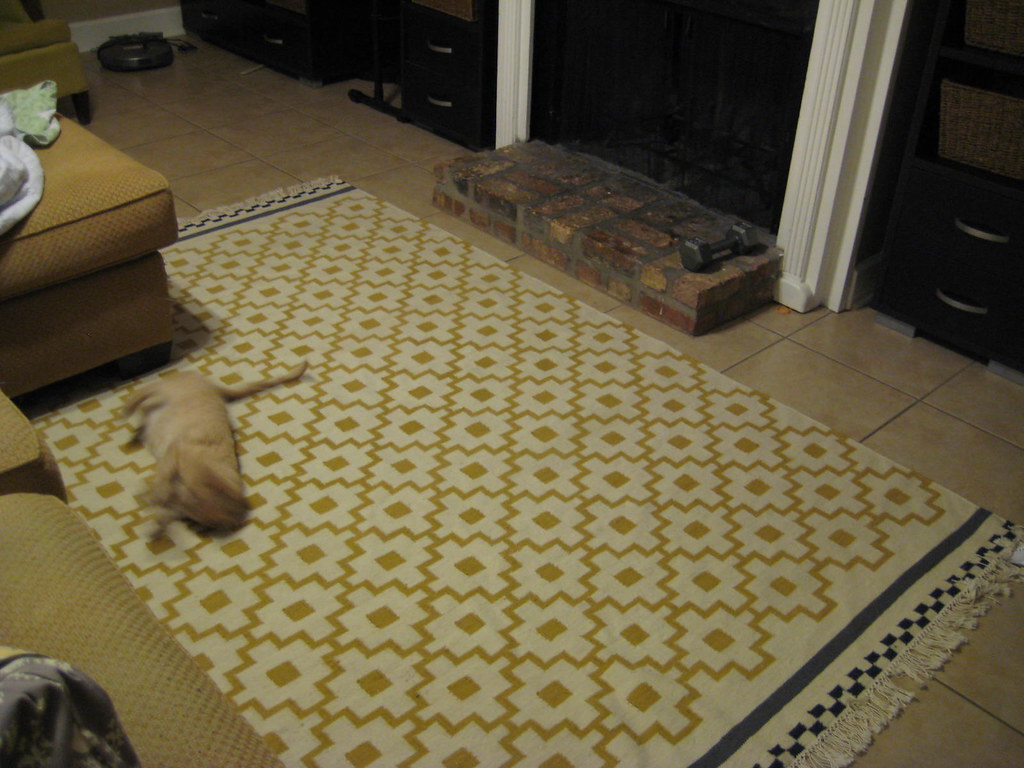
I think somebody likes it!

We were so excited about the bookshelves, though, that we put them together as soon as I got home! The lights didn't come with screws, so I ran to Lowe's today and now our library is complete. We even have extra shelf space to fill up!

houston 044

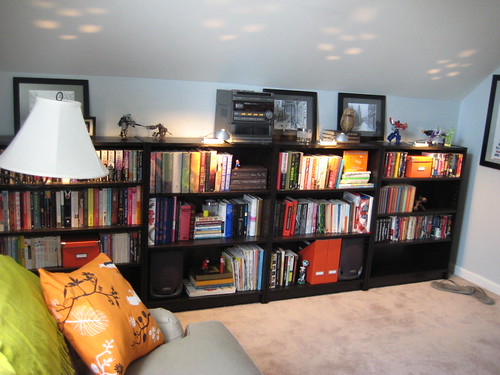
I love how much more put together the office looks with these in place. Plus, we finally don't have boxes of books in the closet! We actually moved the old bookshelves in there, and have some of our books that don't really warrant display in there.

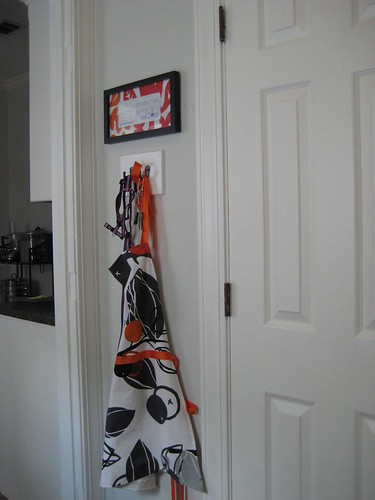
We re-matted the art from the bathroom and moved it in here. Brett loves it and it looks great in the room. We have some new art for the bathroom that should be done this week!

houston 048

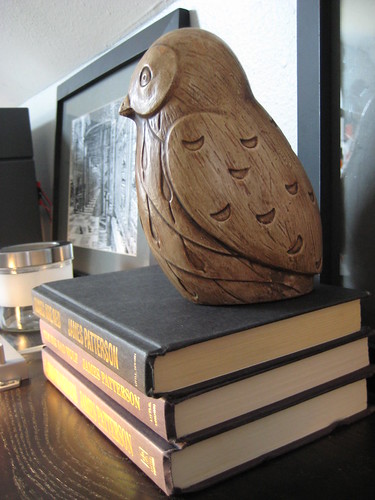
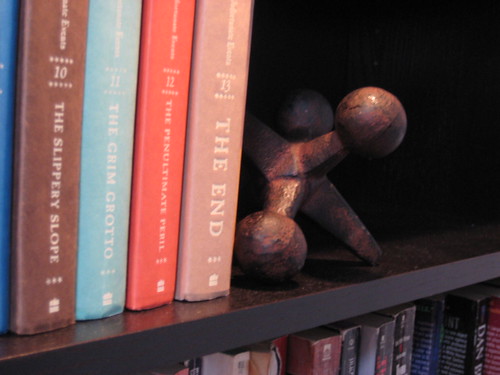
From owls to transformers, and Glamour Dont's to The Godfather, I'm loving how these bookshelves so perfectly highlight both of our personalities.

houston 050

And now, I think I'll spend a little time reading before bed.

houston 049

Monday, May 24, 2010

The Final Choice

We have finally, FINALLY chosen a paint color for our living room. No more swatches, no more samples, no more stopping at the paint section every time we go to the store.

We're done.

And I think we've finally perfected the art of choosing colors for our home. Too bad we don't have to do it any more! After this, the only room we have left is the powder room, and I'm pretty set on Valspar's Coastal Jetty for that room. Regardless, it will be a much easier choice than this one.

We had a few requirements. Light, gray, and the toughest one: must match all of the other colors in the house. Shouldn't be too hard, right?

So we went to Home Depot, Lowe's, and dealers for Pratt and Lambert and various other paints, plus armed ourselves with our Benjamin Moore and Sherwin Williams fan decks. We picked up a swatch of every gray that caught our eye. We seriously ended up with over a hundred colors in mind.

Then we brought them into our dining room and started the selection process.

cabinet paint 001

We could immediately eliminate a ton because they were too dark

cabinet paint 005

or too light

cabinet paint 006

Or too blue or too green.

Then we brought in the fabric we're using for drapes, to make sure there were no clashing issues.

cabinet paint 007

And with the fabric, we were able to narrow it down to a few choices.

cabinet paint 009

After bringing them all in the kitchen, we settled tentatively on Valspar's Stony Path (middle bottom row in the above picture).

On the way home from work Friday, I picked up a sample of Stony Path and the second runner, Valspar Tempered Gray. After living with them all weekend, we finally admitted that they weren't doing it for us. Stony Path was WAY too blue, and Tempered Gray had a purple cast we just weren't digging.

So today, we made a trip to Sherwin Williams to pick up some samples of a color that we eliminated early because it was too dark. We just couldn't stop thinking about it, so we got a sample of the color, and a sample of that color at 50%. We got it home and before they were even drying, we knew we made the right choice. We found our color!

And we even like the darker version!

paint choice 007

It's on the bottom in this picture. I love it with the kitchen color!

paint choice 003

On the left in this picture (the right one is the lighter version). Bonus points to Brett for the beautiful flowers I got for our second anniversary today!

paint choice 005

The bottom color, with the china cabinet.

I am so in love with this color! I just can't wait to cover that HORRIBLE tan once and for all.

Sunday, May 23, 2010

Laundry Room Face Lift

When I bought the fabric for the office curtains, I way over-estimated (this was before my design notebook that has all the measurements I need to estimate yardages) and bought 8 yards. Even though I made double width panels, I only needed like 5 yards, and was left with a lot of fabric.

I knew I wanted to inject some orange into the laundry room. After putting up the magnet message board from Ikea, I was ready for some more decor.

I started with a different fabric. I re-matted our marriage license receipt with a bold orange and red floral (the same fabric I used for the pillow shams in the guest room). I'm also using this fabric for the kitchen window, so it will tie these two rooms together.

I quickly sewed a window topper one night (seriously, 20 minute project easy) using the leftover office fabric. And then I tackled my first non-linear projects.

First, I used my old apron as a template and made a new one using the same orange fabric. I added orange gros-grain ribbon for ties at the neck, and at the waistband. Since my apron hangs on the hooks in our laundry room, I wanted it to tie in with the room's decor. (Sorry for the fuzzy picture)

randoms 042

My last project was a new ironing board cover. I figured the easy way out would be to sew the fabric on top of the existing cover. I got it pinned and wrestled the layers through the machine. I put it on and was happy to see that it worked! I set to pinning a hem, and turned it inside out to turn under the hem.

randoms 045

Again, I wrestled the layers through the sewing machine, and went to put it on our ironing board. And.... it didn't fit. One of my seams went a little too far and shortened it enough that we couldn't stretch it out.

So I bought a new ironing board cover from Target. It's not the original color I had in mind, but I do like it. And apron + curtain + ironing board would have been a lot of one fabric anyway, right? So maybe it's a happy accident.

Even though things weren't exactly as planned, I love the way it turned out. It's so bright and cheery, and it actually cheers me up a little when I'm doing laundry.

randoms 033

randoms 030

randoms 025

How To: Make a decorative plate

So, we all know I have a thing for plates. And a thing for animal motifs. Lately I've been really digging on octopi, and I wanted to add one to my kitchen plate collage. But all of the octopus plates I could find were either over-the-top kitschy, or way too expensive.

Desperate for a cheap alternative, I wondered if there was some way to make my own. I considered a paint your own pottery store. But those places are usually super expensive, and plus, I'm no artist. My plate would end up looking like a spider or a leggy blob.

This morning while grocery shopping, I wandered down the serving ware aisle. I picked up a plain glass salad plate for only $1.49, hoping I could figure something out. I already had all the other supplies I needed, so I wouldn't be out more than $2 if I messed it up.

When I got home, I googled "Octopus drawing" and found the best example on a website for teachers. I printed it out on plain printer paper in high quality (DON'T use cardstock! It will make it much harder to work with). Then I colored it using felt tip markers, in the color palette I wanted. You could also use an image that's already colored, and skip this step. Cut it out carefully with an exacto knife.

So now you have a plate, and the decorative elements (try layering more than one!)

randoms 014

You'll also need a bottle of Mod Podge (I used matte, but glossy is probably fine too), a couple of foam brushes, and paint for the background.

Put your paper face up on a piece of scrap paper or cloth. Apply Mod Podge all over the face.

randoms 016

You really don't need to worry about making it even or looking good. It will dry clear and you won't be able to see it.

randoms 017

Next, apply your image to the BACK SIDE of the glass plate, facing the right side of the image down. When looking from the front of the plate, you should be able to see the right side of the image.

randoms 018

Clean any excess Mod Podge from the back of the plate, and let it dry. I used wet paper towels and Q-tips dipped in water to clean it.

randoms 019

Once the Mod Podge is dry (I waited about an hour and it was plenty), you're ready to paint! I used old sample paint from our bedroom. I mixed two shades together and brushed it all on. Don't worry about getting paint on the paper. You won't be able to see it from the front.

randoms 021

The first layer of paint will probably be pretty streaky. I also added some "waves" with a flat brush. Once that layer is dry to touch, you can add a second layer. I added some black paint this time for depth.

randoms 024

Once it's dry, clean the front of the plate and there you have it! A totally custom decorative plate for under $5 (assuming yo don't have paint already). If you sealed the back with clear coat, you could even use it! Just hand wash GENTLY.

I'm going to give it a few days to dry before I attach the hanger to the back, but for now it's sitting pretty in the kitchen window!

randoms 037

randoms 040

Not too shabby, right?

Let's get serious

I am usually not one to post about serious topics. But something happened today, and since most of my readers have a similar "tackle it now" personality, I decided to write about it.

I work in an industry that puts safety above all else. I worked in a manufacturing plant for three years, and steel toed shoes, ladder safety, and hard hats were part of my every day life. Even now that I have switched to a job that is strictly in the office, I still have to fill out a card every week with possible hazards (of sitting at a desk, walking, driving) and how I'm going to avoid them.

And yet, I'm not nearly as careful at home. I don't put on my safety glasses to mow the lawn. I don't maintain three points of contact when I'm climbing a ladder. And I wear flip flops when I'm doing tons of things I shouldn't. I've shocked myself more times than I can count because I didn't check to make sure I flipped the right breaker. But today, I really scared myself.

I was hanging a window topper that I made for the laundry room. I had used a kitchen chair to get up on top of the dryer. And I had just gotten home from the store, so I was wearing something probably even worse for climbing than flip flops--gladiator sandals. As I was about to step down, my shoe strap caught on the chair back and I fell, from the top of the dryer, into the kitchen, to the hard tile floor.

I am fine, but I really believe I got off easy. My head barely missed the counter top. I was able to get one foot under me to break my fall (which gave me a twisted ankle, but better than a possible break, right?). I got off lucky with my ankle, a busted lip, and some soreness in my back, arm, and neck. But it could have been much worse. I was home alone, and if I had hit my head, it could have been hours before Brett came home and found me. In the half second that it took for me to hit the floor, tons of scenarios went through my head. And I am so thankful that none of them happened.

I'm making a commitment to myself and my husband that I will have the same attitude towards safety at home as I do at work. From now on, it's strictly tennis shoes any time I'm climbing. We're thinking about shutting off the main breaker any time we work on electrical, but at the very least we're getting a volt meter and checking before we start. And I'm going to be very selective about which jobs I'll do alone at home. I'm not going to freak Brett out with my casual attitude towards very powerful saws.

I hope you guys will do the same without having a scare of your own. Really, it doesn't add much of an inconvenience, or extra time, and nothing is worth an injury, or even a scare!

And now, back to posts bout throw pillows and paint colors, I promise.

Sunday, May 16, 2010

A restful weekend

We finally had a weekend with no guests and no big projects looming. And after the last few weeks we really needed it!

There were a lot of things we needed to take care of (changing the oil in Brett's car, lots of weed pulling), and we had a ton of small projects that needed to be taken care of. Plus we needed a little bit of relaxing too!

First of all, let me apologize for the truly heinous picture quality in this post. It's after dark and insanely humid, and I knew I wouldn't get to posting this week if I didn't do it tonight.

After yard work and a quick swim at the Y, we started off the house projects with touching up the paint in the kitchen and replacing the outlets and switches. This ended up being much more difficult than we planned, due to there being NO leeway in the wires behind a couple of the outlets. But after lots of struggling and an unplanned trip to Lowe's for longer screws, we now have white, right side up outlets and switches in the kitchen! 5 rooms down, 5 to go! The two bathrooms are on the list for next week.

randoms 007

randoms 006

Now all we have left is to caulk, and I've got to make a Roman shade and the kitchen will be done other than the floors. I'm still on the lookout for a vintage dresser or credenza to fill out the plate wall, but I'm happy with the kitchen as is until I find the perfect (cheap) piece!

After that, we just hung out in the office, with Brett playing video games and me reading my new design books (Domino and Apartment Therapy, both great with tons of eye candy). I was so hppy to be able to hang out up there and read on our new sofa!

randoms 012

We picked it up last weekend at an estate sale for $100. It's perfect for our office/library, and in great shape. And so comfy for a short person like me. It's perfect for lounging!

That orange pillow is the first peek at today's major project. I busted out the sewing machine and sewed up a storm! Besides the orange bird pillow for the sofa, I made new pillow covers for the guest room. The hot weather has me itching for some hot colors, and the guest room is looking much brighter!

randoms 009

randoms 010

We especially love the yellow one! Sometime this week, I'll be recovering the canvases with these fabrics and the orange one from the office as well.

I also made a cute floral pillow for the sunroom.

randoms 004

Even though we didn't have big plans for the weekend, I think we made a pretty big difference in our home!

And although it has nothing to do with this weekend (other than the fact that we FINALLY got some rain, thank goodness), it has been six weeks since we planted our flowers. And not only have I not killed them, THEY'RE GROWING!

And before anyone cries "Foul! Your husband used to work at a garden center!" This is all me, baby. I admit he has reminded me to water them sometimes, but I'm taking care of these, and they're not dead yet!

The petunias are actually overflowing!

randoms 002

randoms 003

And the begonias are looking awesome.

randoms 001

Actually, I'm so confident in my plant care skillz that I got a philodendron for the sunroom last week. I love this ultra cheap pot from Target. It was either $4 or $5!

randoms 005

I think my black thumb has a little green under it after all!

Tuesday, May 11, 2010

More than all the tea in...

China!

We've been looking for so long to have a place to store our china, I m now so happy to have it displayed in our dining room.

First, we scrounged Craigslist and got a smoking deal on an 80s castoff. Then we primed and painted (and went through fits with the color). This weekend, we finished it off with some wrapping paper from Ink and Paper and a bottle of Mod Podge.

So with a little bit of 80s in the furniture and some 70s in the paper, we've hopefully made our dining room a little more modern.

tile 043

I love the way our simple china stands outs against the bold backing.

tile 045

I can't wait to see it with gray walls and some more modern dining room furniture. In a few years, of course.

Sunday, May 9, 2010

Grout!

Okay, I'll be honest here. Grouting is a total pain in the ass.

Actually, I have no idea how hard putting the grout on, because Brett did that. But the plan was for me to wipe off. After it was getting harder and harder, Brett started helping me, and then he pretty much finished it off while I cried. Okay, so I didn't really cry, but my hands still hurt 4 days later.

But the result? So worth it.

tile 030

Look at that beautiful tile! We love the gray grout with the white tile. It really makes the running bond pattern stand out.

tile 029

tile 033

Still to do:

1. Switch out outlets and switches and install new plates
2. Touch up paint and caulk around tile
3. Make Roman shade for window and install
4. Deep clean tile to get rid of excess grout
5. Build or buy storage piece for plate wall
6. Waaaaaaaaaaaaaay in the future when we forgot about the difficulty of grouting, we'll retile the floor

We are so close to done I can smell it!

Notice something about that picture of the sink area? It contains the fridge, which I've been too ashamed to show for a while. The top of our fridge was a big mess for the last few months.

Thankfully, our love for the backsplash inspired us to clear our countertops. Only things we use daily are staying. Which means the coffeepot can go! And the fruit will stay in the fridge (Brett prefers it cold anyway). Veggies that need to stay room temp are going in the cookie jar, and the catch all above the fridge has been condensed into an accordion folder beside the microwave. We consolidated two junk drawers down into one, which gave us an extra drawer for cooking utensils.

That catch-all from the microwave? Now it's on top of the fridge holding our bread and bagels. The glass jars hold coffee and cereal, so we have all of our breakfast stuff ready to go.

tile 034

You know, after hating my kitchen for what seemed like so long, I'm just happay as a muddy pig in the sunshine to spend a lot of time right here.

tile 038

Saturday, May 1, 2010

Splish Splash!

On Thursday, we realized that it had been SIX WEEKS since we ordered our backsplash tile. The tile that was supposed to take two weeks. So I called for what seemed like the millionth update on timing, and instead of hearing "a few more days" they told me it was being unloaded from the truck!

I made a stop on the way home from work to get all the necessary supplies, and on Friday morning, we picked up the tile and got to work. We also realized that we forgot to order bullnose tile for the edges, but it should only take a couple of days (white bullnose is very common, unlike the gray glass that took six weeks).

We started with the stove wall. We used a tutorial from This Old House and found it to be very helpful, except for a couple of exceptions.

Our first step was marking a level marking between the two runs of countertop. Then we found the center and marked a vertical level line all the way to the top and in DARK pencil. Since we went with a running bond pattern, we measured 3" over from that, and made another dark vertical line. Both of these lines need to be seen through your adhesive once you notch it.

Then, we passed the point of no return and started slathering on the tile adhesive. We used Omni brand adhesive. You need adhesive for wall tile since gravity isn't helping it out. With just thinset, you would have a harder time getting the tiles to stay up. We put the adhesive on with a small, wide putty knife and then used a notched trowel (the smallest size. They are labeled based on which size of tile you're using) to spread it and make the lines. Apparently these lines are really important because they cause suction and help the tiles stick.

And let me tell you, these tiles really stick! I was really pleasantly surprised at how easily they stayed up.

We started with the center line and went out from there. It's a good idea to generally start in the center of your focal point (in this case, the stove). But you should lay out your tile before you begin to make sure you don't end up with a tiny sliver on one side or something. Basically, I found that a lot of tiling is using your judgment.

So we were rolling on the white subway tile. Once we got three rows done, we were ready for the glass. The glass came in sheets of 18 tiles. We trimmed them into three strips of two rows each for our stripe.

After we had most of the wall done, we were feeling pretty spiffy!

tile 016

Note: this is probably the best picture of the color of the glass tile. It's a smoky gray with a touch of brown that almost perfect matches our countertops.

But while we were trying to do the cuts underneath the upper counters, things were not going well. We did okay on the cuts around the outlets. (This picture isn't upside down. The outlets are. I'll try to remedy that tomorrow).

tile 013

But the cuts at the top required long, very skinny pieces. And the $14 tile scorer that This Old House assured us would be enough was, well, not enough. For shorter cuts, it was okay (although we ended up with quite a few jagged pieces). But for longer cuts it ended up breaking the tiles into pieces.

After a lot of frustration and a glass tile shard in my leg, I called Home Depot and rented a wet saw. We hoped it would be a breeze. We started small with an easy straight cut.

tile 009

And it worked! The tile saw is my new best friend. But Brett may love it even more. He would barely let me touch it! I'm sure this had nothing to do with me sticking my hands where they are apparently NOT supposed to go.

Once we had the saw, we were ready to roll. Filled with confidence and hunger, we did all the cute for the oven wall, finished it up and had some dinner and went to bed.

We woke up early and antsy this morning. For the second wall, the focal point is our bumped out window above the sink. It might be the very best part of the kitchen, and it brings in the light that makes me love being in this room so much. We wanted to feature it the way it deserved to be featured. And painted drywall wasn't cutting it.

tile 019

So we tiled it. We went with a running bond pattern going the opposite direction, and I'm in love. Even if a few tiles fell on my head in the process (the secret is to press REALLY hard when you put them up). It's really stunning.

tile 024

After the window was done, I climbed out of my 11 by 35" jail cell (I had to set all of those tiles because my 6'2" husband just wasn't going to fit. Since getting in and out from behind the sink was less than easy, he cut all the tiles and I didn't get out until I was done) and we made a quick run for more adhesive.

Then we were ready for the easier stuff. Now that we had our tile saw, straight runs were easy peasy. We even had enough time leftover that we tiled the fireplace surround!

tile 020

tile 023

tile 027

I can't wait to see it all done. It makes us want to have nothing on the countertops!